Events from Jan 66 to Aug 66

A Movie Sequel in the Planning

Daleks – Invasion Earth 2150AD
The first Dalek film had been a modest success, which lead Joe Vegoda and AARU to plan a sequel based on the second Dalek TV adventure. The idea had been mooted as early as April 1965 and an 80-minute script was developed from Terry Nation’s original work. Official confirmation of the new film came on 16th December 1965.
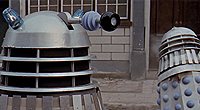
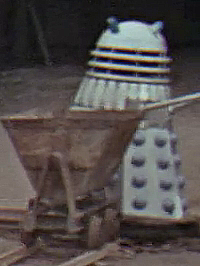
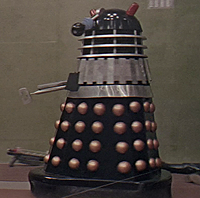
There was another important event five days later, when the stage play The Curse of the Daleks started its run at Wyndham Theatre. The theatre production featured five brand-new Shawcraft Daleks built using the same moulds as the other recent props, but they were finished to resemble the television Daleks in their earliest guise, with one leader painted up black.
These expensive and authentic-looking items seem extravagant for a small theatre production. An obvious assumption might be that they were leftovers from the first Dalek movie, but in fact there weren’t five movie Daleks available at the end of 1965 because their numbers had been depleted by prize-giveaways and national tours.

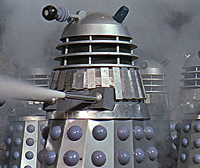
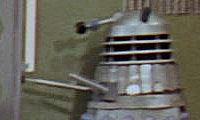
Curse prop with unusual V-shaped pincer
The proof which kills the theory of these being first movie Daleks is that they have small but important build differences. Most of the stage props had visible seams in the fibreglass between the gunboxes, whereas all bar one of the movie props had theirs sanded away. The screws on the lower collars are different in the two batches of props too.
In December 1965, AARU had announced their big-screen sequel, which was duly given the title Daleks – Invasion Earth: 2150AD. Frustratingly, the shooting schedule, along with the reasons behind many creative and technical decisions, are shrouded in uncertainty due to the lack of paperwork. Only by painstaking examination of the finished film and publicity photographs, it is possible to piece together the full story of the production, and tell the tale of the Dalek props.
New and Used Daleks

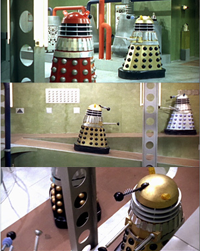
The impressive Dalek Saucer set
During January 1966, AARU’s big-screen sequel was in pre-production. Ambitious sets were constructed, and a number of new Dalek props were ordered from Shawcraft.
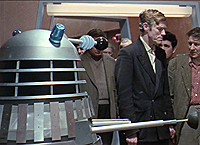
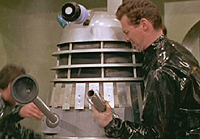
Adding to the batch were recycled casings from the stage play. When the play had closed in early January, Milton Subotsky had taken the chance to hire the five Daleks created for the play. A cost-effective way to boost the numbers. The links between the two productions were confirmed during a photoshoot on 19th January in which actress Jill Curzon posed in a number of outfits alongside a newly-finished movie Dalek. But this was no ordinary movie Dalek.
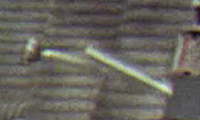
A prop with two Curse of the Daleks attachments
Publicity photographs for the play a month earlier had shown one Dalek sporting a very distinctive V-shaped pincer – and this unique appendage was now attached to the new movie prop. For the Curzon shoot, not only was the arm a left-over from the play but also the gun – as it carried the spokes and narrow barrel which had been faithfully reproduced for the theatre, to mimic the TV series.
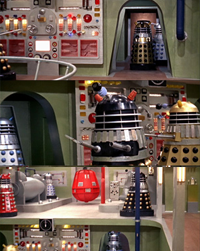
Dalek with Silver Cone and Disc “Lampshade”
The former lives of the new movie props also explained other curiosities seen in the batch that were readied for production. Two Daleks had an unusual silver attachment on the end of their arms comprising a cone with a disc behind it. In Curse of the Daleks, props were fitted with torch attachments for illuminating secret sensors and therefore these appendages will be described as “lampshades” from here on.
Quirks in the build of the ‘Curse’ props are seen again in the movie. Click for a larger view.
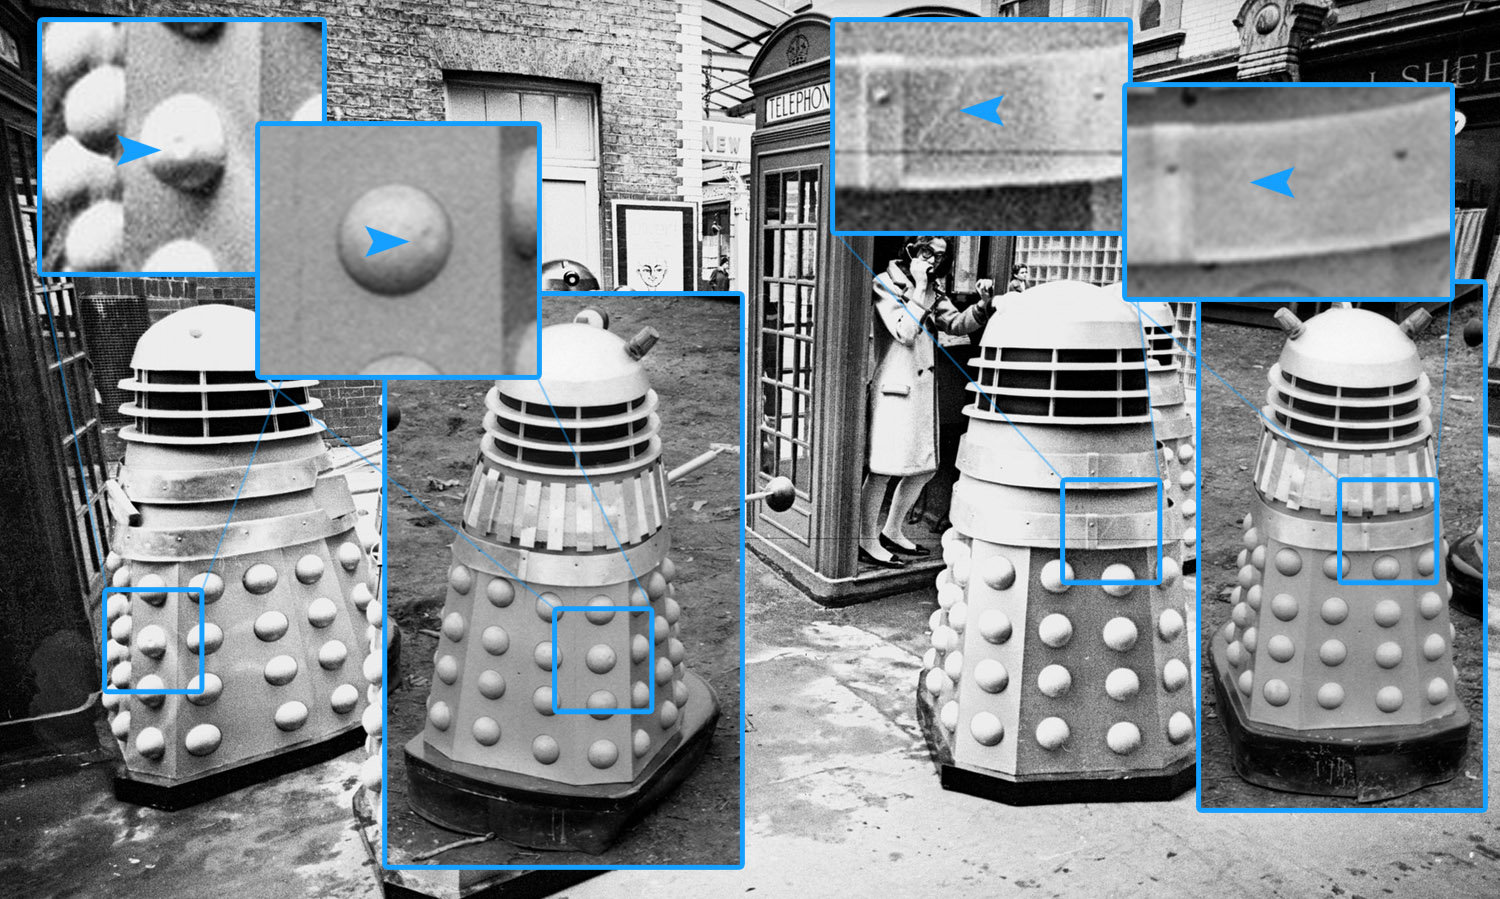
Less obvious links between the Curse and movie props are also revealed in two publicity photos. Despite there being precious few images taken of the play at the time, there is one picture that reveals several build quirks on two of the Dalek props.
In the image on the right (taken outside Wyndham’s Theatre), the Dalek prop on the left has a very distinct ‘dent’ in one of its hemispheres. This can be seen in the same place on a prop in a picture taken on the Shepperton backlot. Similarly, the prop to the right of the Curse picture shows a distinctive scratch across its lower collar which is also seen in the movie picture.

Another prop with a “lampshade”
With AARU looking to save money on new Daleks wherever possible, other avenues were explored, such as determining whether any props were left over from their first film. But by January 1965, three of the eight original hero props had already been given away as prizes in competitions and three more had gone on a promotional tour which was still running well into 1966. The seventh travelled to Australia for promotion down-under. If any props could have been located for recycling then only the blow-torch prop was available which would have required extensive repairs and remodeling. Due the degree of refurbishment needed to convert old movie props into new ones, all clues would have been obliterated that might prove whether this happened.
Bluer hemi colours on left, and more purple on right
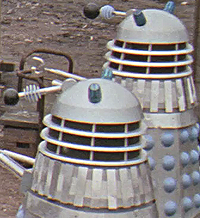
To hide their varied origins, efforts were made to create a set of props with a uniform appearance. In the main, they looked like the most recent style of TV Daleks, with an overall silver-grey livery and blue hemispheres. This suited the conversion of the Curse props since that already formed the basis of their colour scheme. In a departure from the construction of the TV props, the slats were metal. The original Perspex slats were prone to snapping during studio recording, whereas metal ones stood up to more rigorous treatment, although they could still be bent or buckled by mishandling.
Most of the props had a slightly purple tint to their hemispheres, but some of the Daleks’ bumps were baby blue, akin to TV props. Some Daleks had hollow eye-balls with a light inside, whilst others merely had a white disc glued to the front.
A Vast Army of Variable Quality
Daleks mimicked the current TV appearance
With so many props being ordered, an unprecedented number of people were required to work on them in a short space of time. As a result, the quality varied considerably between different Daleks depending on who was responsible for the work, and this was most noticeable in the construction of the shoulders. For example, the first prop to venture out in public was used in the aforementioned Curzon photoshoot. As well as retaining its The Curse of the Daleks appendages, it had only six small slats over the gunboxes, and they were inconsistently positioned. The rest of the Daleks were given seven slats, but they were often crooked or badly-spaced. The mesh behind the slats was imprecisely cut on many occasions, and there were other differences such as over-sized eyeballs or black eye-pivots.
One Prop is later fitted with a Small Silvery Sucker
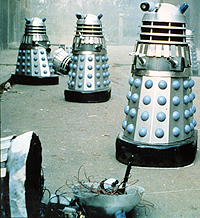
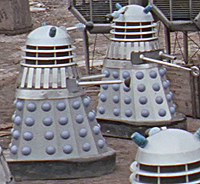
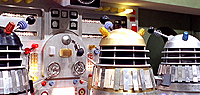
The finished collection of casings fell roughly into three classifications of build quality. Eight “primary” props had slats which were neatly cut, they had ordinary appendages and they were extremely difficult to tell apart. This collection of props included a Red Dalek which was intended to be one of two leaders.
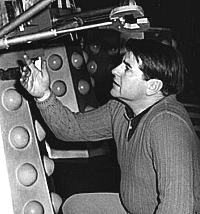
Robert Jewell inspects props used mainly for stunts
A further five props of a “secondary” level of quality created a group of 13 main props. The “secondary” batch’s common characteristic was a poorly-constructed shoulder section. All except one had their half-slats at the front cut too long, and to varying degrees. Two Daleks with normal-sized front slats instead had wide-spaced rivets attaching them to the collar. As mentioned, the “Curzon Dalek” had only six front slats instead of seven. The mesh behind the slats was cut unevenly and the height of it varied from one prop to the next.
Amongst this “secondary” group there were also unusual types of appendage. As previously discussed there was a V-shaped pincer, and two Daleks had a silver cone with a disc behind it – the “lampshade” attachments.
Robert Jewell is shown around the Dalek props at the start of production
Finally, a collection of six “tertiary” props was built which were lighter and generally intended for stunt-work. But these props were not simply FX “dummies” – they all had fully-working limbs, a head rotation mechanism, wiring for the lights, and wheels. They were fitted with seats for operators too, indicating that corners had not been cut in areas that would not be seen. The materials used in some of their construction, however, were of a lower standard. The collars and slats were cut roughly from a thinner aluminium, the shoulder and neck mesh were more coarse, and the paint-work was less pristine. Broadly speaking, these were the props intended to take some punishment – but they were still capable of working amongst the main props if needed to bolster the numbers.
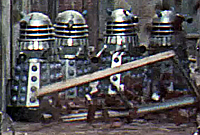
The different types of casings altogether bring the total number of props in Daleks – Invasion Earth 2150AD to an incredible 19 – greater than the sum total of all other Shawcraft props which had been built up to this point.
All 19 props were ready for the start of what would be a difficult shoot. Only one skilled operator was employed, Robert Jewell, and he trained nine extras to operate other props. Jewell was adept at performing slick, complex movements with confidence. Despite his efforts, the inexperience of the extras was difficult to overcome as they found it hard to keep the props straight and make all the necessary head and arm movements simultaneously.
Underused Daleks and Unwell Actors
The first Dalek used in the shoot Prop 2
With this vast array of Daleks ready, plus the human co-stars, filming commenced on 31st January 1966 at Shepperton Studios. The numbering system employed here to describe the Dalek props is based loosely on the number of scenes in which they would be used for filming – the lower the number, the more frequently they would be in use. But, in addition to this, the build-quality has some bearing on their classification, with the lower numbers also generally being the best-looking. They will be referred to with the prefix “AARUII” – meaning AARU’s Production Number II.
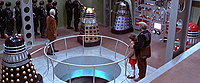
The first scenes to be completed were those inside the Dalek saucer, in which “Dr Who” played by Peter Cushing, “Tom” played by Bernard Cribbins, and other prisoners were segregated into their cells, before escaping. The first props to be used on set were the Red Dalek AARUII 1 and a silver prop, AARUII 2.
Initial studio work had the Daleks mainly in long-shot
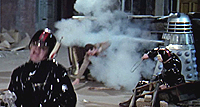
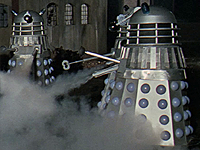
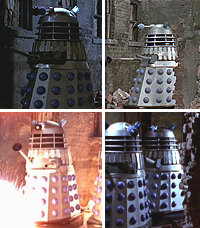
Next to be shot were the scenes featuring the exterior of the saucer situated in a destroyed London street. This ambitious creation in Studio H featured a full-sized section of Dalek spaceship, bombed-out houses, and a scrap car. The initial moments saw the Red Dalek AARUII 1 take centre stage again and along with AARUII 5 attempted to stop an escaping prisoner as he begins to make his run. AARUII 9 fires up at man as he climbs the derelict building and after he has fallen joins AARUII 1 and AARUII 7 for the final extermination.
The first studio session lacked good Dalek shots
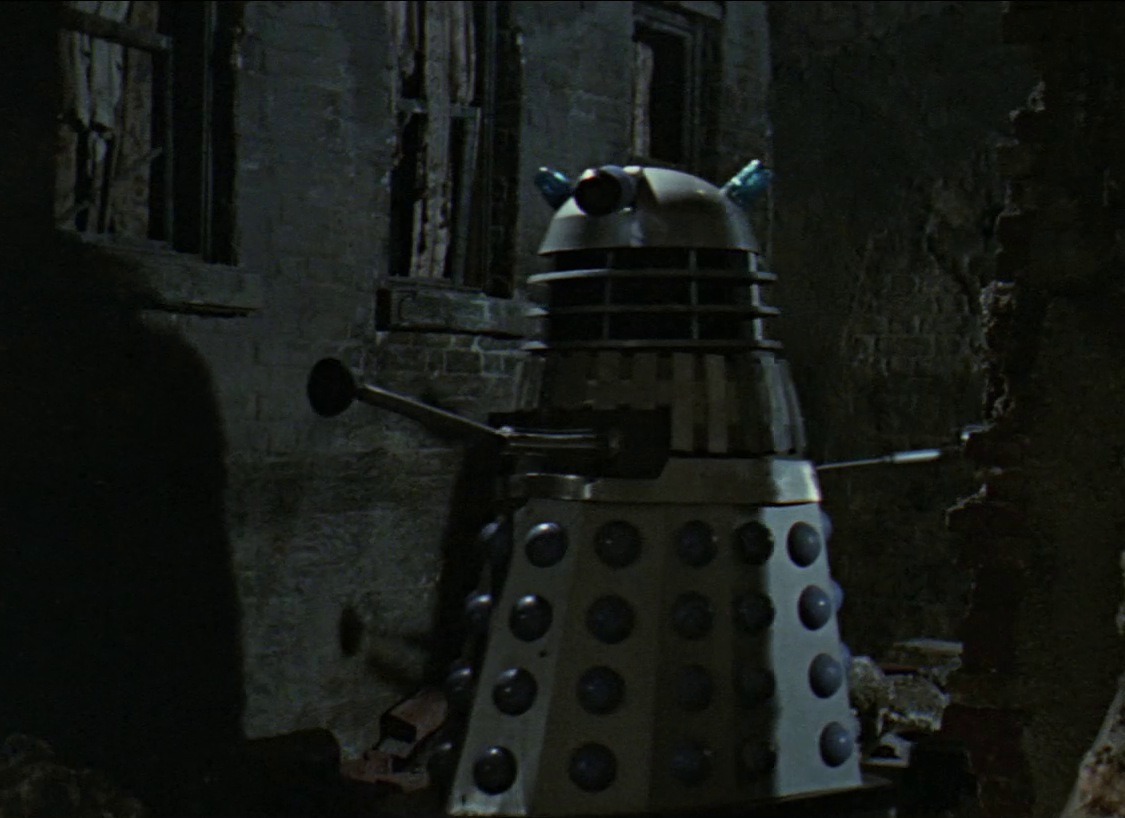
After the studio lighting was altered to simulate night-time, Dalek AARUII 7 was brought to the fore for two prominent moments which bridged a break in filming. AARUII 7 first stopped David who was disguised as a Roboman as the rebels made their way into the set past the abandoned car. A halt was then called to filming whilst the studio was prepared for battle. Explosive charges were set up on the floor, the car was tipped onto its side and AARUII 7 was taken up into the spaceship for the next shot.
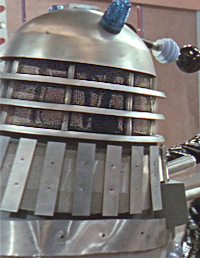
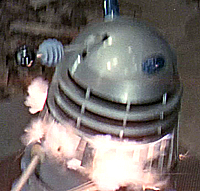
Image enhancement shows Prop 14’s eye mechanism
The cameras rolled again and AARUII 7, now at the top of the ramp, challenged David a second time! This Dalek was then removed and the empty casing of AARUII 14 was brought in, so that it could be flung down the ramp. The neck of this prop had a finer mesh with a lower opacity and it is easy to see the mechanism inside for operating the eye, especially with a little enhancement of the image.
Prop 5’s shoulders are blasted
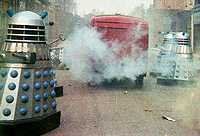
When the rebels made their assault, the high-quality prop AARUII 5 had a smoke charge set off next to it during the battle, and subsequently it had a series of explosives detonated around its shoulders. The scorch marks caused by this blast were not cleaned off and it was an illustration of how the vast number of available props resulted in a general disregard for how good casings were employed for stunt work.
Distant Daleks beside the overturned car
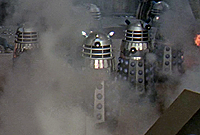
At the end of the battle, the insurgency was put down by a phalanx of seven props which advanced in the distance spraying their CO2 guns. As explosives were set off on the studio floor, the powder charges often left dusty white marks across the fenders. The clean, black rubber on the bottom quickly became covered in blast residue which, combined with the dirt from the studio floor, made the brand new props look like they had accumulated a lot of mileage in seconds. Props that escaped the explosions remained looking clean.
The seven props used for this battle formation included AARUII 2, AARUII 3, AARUII 4, AARUII 7, AARUII 9, AARUII 11 and AARUII 12. A reverse angle was shot in which the Daleks trapped the rebels, and four Daleks were used in the foreground, seen from behind, whilst three could be seen in the distance. Those in the foreground from left-to-right were AARUII 3, AARUII 12, AARUII 7 and AARUII 11.
Filming at the saucer was concluded, and the crew moved on to the next set. But Director Gordon Flemyng was then faced with the realisation that this opening set-piece had been rather lacklustre. The majority of the action in the skirmish had involved humans fighting Robomen, not the Daleks. The metal aliens were shown mainly in long-shot, but it was too late to re-shoot the battle. The only option was to try to create more footage at some point which could be edited into the battle. He would have to improvise later.
To make matters worse, the lead actor Cushing then fell ill and a production which already had its difficulties was suddenly facing a disaster. Hasty changes had to be made and shooting switched to scenes involving other actors. Cribbins was filmed inside the saucer and AARUII 3 patrolled up and down the Robomen before they ate. Scenes were completed such as Wyler and Susan being betrayed by old the women at the cottage, in which AARUII 4 was used. This shot also shows that AARUII 4 had become paired with the skirt originally seen with AARUII 13 in the photoshoot with Jill Curzon.
The Van Blockade Scene
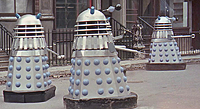
Fifteen props were taken to the Shepperton backlot
The next major use of multiple Dalek props came during the scene in which Wyler and Susan attempt to escape the Dalek street blockade. Fifteen Dalek props were used in the making of this sequence and despite it only lasting a few seconds on screen, the scene was highly complex and shooting took longer than expected.
Filmed on the Shepperton Studios backlot, this FX stunt scene was set up in the street that was due to be redressed for the robbery at the opening of the film.
The initial shots show the van approaching a collection of ten Daleks which are moving into blocking positions. These were AARUII 6, AARUII 2, AARUII 3, AARUII 9, AARUII 11, AARUII 12, AARUII 13, and AARUII 10,and the lighter props AARUII 15 and AARUII 16. The props were reset for a close-up shot of the same formation, at which point AARUII 4 joins the action, still with the wrong skirt.
Having so many props in a row shows off the different hemisphere colours, AARUII 6 and AARUII 15 can be noted for their bluer tones.
After the establishing shots were done, special effects technicians then moved in to wire up a series of explosive charges on four of the props to accompany the van ploughing through the line. Three collisions would be seen in the final cut.
Props 17 and 14 in position for the first collision
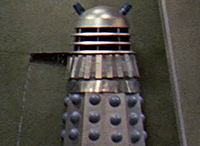
For the first take in which the van crashes into two Daleks, AARUII 17 and AARUII 14 were used, also with blue hemispheres. AARUII 14 had previously been thrown down the ramp in the rebel attack on the saucer but suffered little damage except for a slight burn to the skirt.
Upon the first impact, due to the van’s large bumpers, most of the connection was to the Daleks’ skirts. This thrust the props sideways and launched the shoulder sections high into the air, away from the vehicle. It caused some damage but not enough to ruin the props.
AARUII 14 was then set up again alongside a ‘new’ stunt prop AARUII 18 to re-shoot the shot from a different angle.
However, the initial take featuring these two props was deemed a failure, and the shot had to be set up again with the damaged props returned to their positions. In the final cut of the film, it can be observed that just before the van strikes from the second angle, the props are already damaged, and as one of these props was not seen hit in the first angle, it illustrated the “missing” take. This is confirmed by promotional photographs which show that a different collision was indeed filmed that never made it to screen.
Prop 17 repositioned for another hit
The third angle was filmed on the back of a moving vehicle, with the van driving towards the camera. At this point the prominent parked car was removed from the street. AARUII 17 from the first collision was reused here as most of its front damage was not visible from the rear.
Whilst this sequence was still being completed, work had to be started on the street to prepare for the robbery sequence filming. The activity of the set-decorators was made evident by the fact that new shop signs appeared on the buildings between takes, indicating the hectic schedule.
Prop 4 speaks with prop 18 dead in the background
With the collisions finished, the props were set-up for the aftermath. For this shot a Dalek was required to deliver a line of dialogue in close-up after the van had disappeared around the corner. To ensure everything was correctly framed for multiple takes, a chalk outline was made of AARUII 4‘s fender on the tarmac so that when the camera whipped round, the Dalek would be in focus with the destroyed casing of AARUII 18 in the background.
Prop 4 in the foreground as the van burns rubber
During the filming of this aftermath shot, pictures were taken by a photographer who stood in the centre of the street. The van sped away from the photographer (leaving tyre marks in the process) and these iconic shots are not only great promotional images for the film but are a fascinating insight into the production of the film, since they show the chalk mark on the ground, and the debris of prop AARUII 14.
Prop 4 has a chalk outline to align the close-up. The remains of prop 14 are in the foreground. The two halves of prop 17 are in the distance.
Following the carnage in this scene in which multiple props were damaged in different ways, the skirt of AARUII 6 had been left with noticeable damage to its skirt. A small fracture had appeared near the front just above the fender.
Shortly after, with all the shop signs in place and the backlot properly dressed, the street was used to shoot the robbery scene that would open and close the film.
With Peter Cushing recovering from illness, work was done on the Robotisation process. This employed two Daleks which had been absent from the street blockade: Red AARUII 1 and AARUII 3 at the controls.
Mine All Mine
Props 12 and 4 (with correct skirt) at the shed
The cast and crew next moved to the open fields at the Shepperton backlot, where the Daleks’ mine-workings had been created. The set featured a tunnel entrance, watch-towers, sheds and various containers.
Establishing shots of the entrance were done which featured a number of male and female extras. Scenes involving Cribbins and Curzon were also completed. AARUII 3 was on guard duty and AARUII 13 was sent patrolling in the background. Despite the long-shot, its unusual V-shaped pincer from The Curse of the Daleks was quite visible, and behind-the-scenes photographs show the spoked-gun.
These were not the only hangovers from the stage play which were in use on location, as AARUII 10 can be seen with its “lampshade” attachment.
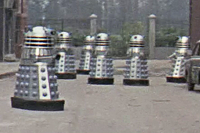
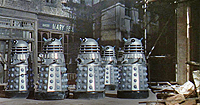
The two props with Curse attachments were then absent from the next iconic moment in the film, when the Daleks encircled the shed for its destruction. The eight props which form a semi-circle are (from left to right):AARUII 4, AARUII 12, AARUII 3, AARUII 2, AARUII 9, AARUII 11, AARUII 5 and AARUII 15. It is AARUII 3 which escorts Peter Cushing away.
Prop 15 (behind) with “leaning back” neck
Prop AARUII 15 featured here alongside other main props, and cannot be distinguished from them except for the fact it remained motionless. Despite its static appearance this wasn’t an inoperable “dummy” as demonstrated by the fact this Dalek had previously been advancing up the street in the blockade. One distinctive feature about this prop was that its neck cage looked as if it’s “leaning” towards the back.
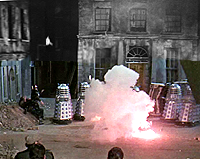
All operators were then removed from their Daleks for safety, and the shed was rigged with explosives for its destruction. The impressive blast showered the props with debris, but nothing was heavy enough to cause any serious damage.
Prop 7 is rammed with a mine cart
The Robomen’s rebellion at the mine was then filmed, at which point only male extras were used as they fought the invaders. As Louise exited the tunnel, AARUII 7 had its eye-stalk wrenched off, and it was then rammed with a freight truck. Prop AARUII 15 was back in use as a hero prop and can be seen with its distinctive “leaning back” neck as Louise and David run from the entrance.
The prop AARUII 2 which had been on the top of the hill was then moved down to nearer the entrance and a second shot was then completed which featured Cribbins making his escape too. As he runs up the hill, he is blocked by AARUII 2 which is positioned on the mine cart tracks and a close-up was shot in which a tarpaulin was thrown over its head.
AARUII 12 is also seen lurking by the entrance when Tom makes his escape from the mine.
Restaging the Phalanx
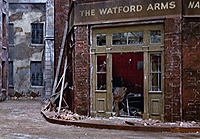
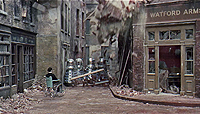
The walls of The Watford Arms were set up to collapse
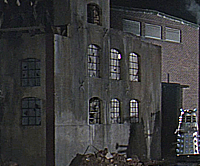
Back in studio H, construction work was being carried out on a section of London needed for the moment when the wheelchair-bound Dortmun sacrifices himself to destroy a squad of Daleks. Unlike the standing street set on the backlot at Shepperton, which depicted generic late 19th or early 20th century frontages, the script demanded that the buildings for this scene were half-destroyed in order that Dortmun’s bombs could bring down the rest of a ruined structure. To this end, the ruined shop section of the saucer landing site set was left standing. The ripped awning was removed from the ‘Mary Bell’ shop and the debris was moved around, however, the ‘broken’ beam that stuntman Eddie Powell had fallen from still remained hanging above the shop. The large house set, opposite the shops, was removed and in its place, construction began on a pub set to be called “The Watford Arms”.
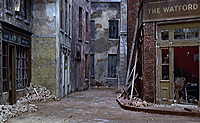
The finished set was due to be used for the filming of Dortmun’s sacrifice
Having realised the shortcomings of the battle at the start of production, Director Gordon Flemyng saw his opportunity to make amends. He decided to utilize the half-ready set to recreate the phalanx shot from earlier, and this new footage could be edited together with the studio material to make a more exciting set piece early in the film.
Construction scaffold can be seen on the right
The scheme required use of dark lighting, in order to match the previous studio work which had been completed in the semi-darkness. The low light helped to disguise the unfinished nature of the set but despite the gloom, scaffold used to prepare the top of the collapsing wall can still be seen as the Daleks make their advance. On this occasion, the camera was positioned lower down and closer to the Daleks, allowing for a great, menacing shot to finally be achieved which had been lacking from the opening battle.
Prop 6 with replacement arm and skirt damage
The Daleks at the front of the attack formation from left to right were AARUII 11, AARUII 6, AARUII 12 (with widely spaced rivets on the slats) and AARUII 3. Three more Daleks brought up the rear including AARUII 4. Up until this point, AARUII 6 had a standard pincer but it required replacement and so a unique attachment was fitted – a small sucker which had the front spray-painted silver. This would remain for the rest of the shoot.
The non-uniform mix of attachments, plus the poor workmanship on the various shoulders, made for quite a disjointed line-up. The rigours of the shoot were also taking their toll. A good view of the damage to the skirt of AARUII 6, originally caused during the ‘Van Blockade’ scene, could be afforded in this scene.
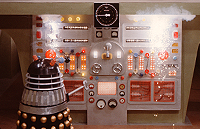
Bomb Control Room
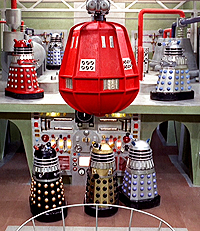
The Gold Dalek
The final major set to be erected was the Bomb Control Room in Studio H – an impressive two-storey room with ramps for the Daleks to glide between floors. The top level featured a winch mechanism which would allow a large bomb to be moved along the ceiling, and either side of the upper floor were two raised stages with machinery.
Shooting utilized just seven of the total props, including two new colour schemes.
The final Dalek prop to make it to screen was the gold AARUII 19 and thus became a third leader Dalek. The prop shared the some characteristics with Dalek AARUII 12 in that it also had some missing slats and the remaining ones attached with the widely spaced rivets. Two purpose-built leaders continued the hierarchy established in the first AARU film: One red and one black.
The new Black Dalek AARUII 9 was not a repainted silver prop. Pre-production photographs show the Black Dalek was already built, and its exterior bolts and washers were silver, meaning it had not been painted after assembly. The Red Dalek AARUII 1 returned to complete the trio of leaders.
The four silver props used in the Bomb Control Room were AARUII 2, AARUII 6 (with small silver sucker attached), AARUII 4 (one of the few props used in almost every scene in the film) and AARUII 11.
With cast and crew ready for a take, shooting was being held up by the fact the large bomb capsule was not yet mounted on the rails that would allow it to move across the ceiling of the set. However, it was decided that, as long as the camera was positioned carefully, a shot could be completed which didn’t reveal the absent device.
The Red and Gold Daleks were stationed on the top level of the set and, to help sell the illusion, the Gold Dalek looked at where the capsule should have been. In fact, despite carefully aligning a girder to disguise the situation, the bomb should still have been visible through the girder’s circular holes, had it been in place. Having received its report about the capture of the rebel leader, the Gold prop then descended the ramp.
Prop 11 on the top level of the set
AARUII 11 was seen moving around the edge of the top floor, with AARUII 6 and AARUII 2 on the ground floor, and AARUII 4 at the controls.
Members of the crew were then able to lift the bomb into position for what would become the opening shot of the Bomb Control Room in the movie.
First shot to be completed has a missing bomb
The Gold Dalek was moved to the back of the set for its grand entrance, and AARUII 2 was positioned to create some activity in the corridor behind it. Hand-held cameras were then used to capture very dynamic shots in which the Black and Red Daleks travelled up the ramps to converge together on the top floor to inspect the bomb.
With the “runway” for the bomb occupying most of the floor space on the upper level, it prevented Daleks from appearing in the centre of shot. To solve this problem, it was decided that AARUII 11 could be lifted up onto the raised stage and thus ensure more Dalek screen-time. The operator in the prop was encouraged to move back and forth and turn on the spot as much as possible in the limited space available.
Second shot as Prop 11 on the rear stage
There was then a break in filming whilst the mechanism was set up which would winch the bomb into position over the mine shaft.
When the cameras were ready to roll again, AARUII 6 was moved up to the top floor in place of the Black Dalek which was relocated next to the ground floor controls. This meant that when the bomb came forth and the camera panned down, there were three props looking up at the device.
Black AARUII 8 and Silver AARUII 6 swap places
In the final edit of the film, this shot would be inter-cut with the first shot of the Gold leader descending the ramp, resulting in various props appearing in two places at once. AARUII 11 jumps between the edge of the top floor and the back on the raised platform, whilst AARUII 6 (with its silver sucker) is seen to the right of the bomb and also on the ground floor at the same time!
With that day’s shooting inside Studio H concluded, it was time to head outside to capture another night-time sequence.
Shepperton’s Sewers
Warehouse scenery at Shepperton
The short Winter days meant an evening shoot provided enough darkness to complete the scene in which the Doctor and David escape into the sewers. About 150 yards from the Bomb Control Set in Studio H, the production team found a suitable drain-cover located in a road right by Shepperton’s main reception. Efforts were made to disguise the area using debris and two scrap cars.
The Daleks were to be filmed appearing around two corners, converging on the fleeing Doctor and David. For this purpose, props AARUII 2, AARUII 4, AARUII 11 all trundled the short distance from Studio H where they had just been shooting, and AARUII 15 was brought in too as it was ready for forthcoming work in the film’s climactic scenes.
In the first shot the Daleks rounded “Hamlet Drive” and trundled north. For the next shot, the same four Daleks were moved to the opposite end of the road to be seen heading south.
The same warehouse scenery earlier in studio
In this second set-up, the highly-recognisable building on what is now “David Lean Drive” formed the backdrop to the shot. In years to come this building would have the large “Shepperton Studios” sign added, along with a new corrugated exterior. To help disguise this structure for filming, a piece of studio scenery was recycled from earlier in the film. Two sides of a warehouse set had been used when the TARDIS landed, so this same fake structure was erected in order to hide the location’s modern appearance. The Daleks were filmed rounding the corner as if they’d just turned right off Studio Road, heading for Main Reception.
Prop 11 on the left has gained a silvery neck
Prop AARUII 15 had been at the mine workings and still had a distinctive “leaning back” neck. As the Daleks advanced down the street, AARUII 4 was on the left-hand side. A second take was performed with the props in a different order and AARUII 4 moved over to the right instead, obscured by AARUII 2.
Between the initial session on the Bomb Control set and this location work, an incident occurred which left the neck mesh of AARUII 11 with an unwanted covering of silver. This noticeable sheen is important because it allowed it to be distinguished easily from the other props from this point, as well as indicating the sequence in which scenes were completed.
Back to Bomb Control
The lower floor of the Bomb Control Set
Having completed their nocturnal adventures, AARUII 2, AARUII 4, AARUII 11 and AARUII 15 were all taken the 150 yards back to studio H’s Bomb Control set where shooting resumed with these same four props in use.
Three of the main cast, Cushing, Keir and Tovey were required to complete the scenes in which the Doctor triggered a rebellion by the Robomen.
Yet another shot of Prop 11 in a different location
With the bomb now positioned over the circular hole in the raised floor of the set, a shot was picked up in which the Black, Gold and a silver Dalek were seen looking up from the controls. For this shot, AARUII 11, now with its distinctive silvery wash on the neck, was used where AARUII 4 had been previously. This meant that in the final cut of the scene in which the bomb was moved into position, AARUII 11 appeared in not just two but three places at once!
Prop 11 with its noticeable silver marks on the neck
The props were then repositioned and AARUII 4 was taken to the top of the ramp to lead a section of Robomen down to exterminate the Doctor and his friends. When the Robomen’s rebellion was staged in studio there was one main stunt in which the Black Dalek’s claw was detached. This was reattached for the resumption of filming causing a continuity error in the finished film.
The close-up in which two Robomen grapple with AARUII 11 afforded a very clear view of the undesirable silver sheen on the neck section.
At the end of the action, various Robomen lay dead around the set including one which fell in front of the control panel. The main cast, the Robomen extras and the Daleks were then cleared off set so that a number of destructive effects could be prepared.
This first take didn’t go according to plan
With the control panel rigged with a series of flash charges, only the Black Dalek was brought back in for filming, and Robomen extras lay back down, albeit in different positions to before so as not to obstruct the controls.
The 2nd take shows minor differences on the controls
Cameras rolled and sparkling explosions were triggered either side of the control panel. The Black Dalek delivered its line to “abandon mine area” but that was the extent of the pyrotechnics. A halt was called, the Robomen extras left the set again, and the effects team faced the task of restoring the burnt control panel to normal again for a second take with more explosions.
With restoration of the set complete, the Robomen extras returned, but took up different positions yet again – this time one of them lay within the door frame at the back of the set. A small amount of charring remained visible on the control panel, and some components were slightly altered but otherwise it looked identical. The second take went smoothly, and crew rushed in to extinguish the fires and preserve the set a little longer.
Prop 15 was repainted for the stunt work
Whilst the pyrotechnics experts moved in to rig the control panel for its final full destruction, the opportunity was taken to shoot the demise of the two leader Daleks which had to fall down the mine shaft hole. It was preferred that the leader hero props were not damaged if possible, and so rather than send the Black hero prop down, AARUII 15 was used instead, following its recent use in the sewer scene nearby.
The stunt double was refurbished with a new neck and head, and painted black with gold hemispheres. One end of a wire was drilled into the skirt and it was coiled around the prop, so that when the cameras rolled, pulling the wire caused the prop to spin into the mine shaft hole.
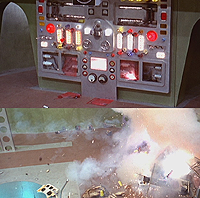
Control panel before and after destruction
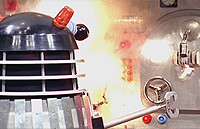
After a break in filming which saw the “dead” Robomen extras moved to very the edge of the set for safety, the Red Dalek was put into position on the top floor. It was first filmed losing control up on the raised stage, before being lifted down and fitted with a board to hide the hole for the operator’s feet. It was then propelled over the edge of the set and into the hole. Unfortunately the shot wasn’t a bullseye. The prop landed on its dome, resulting in the neck being badly buckled and the eye and lights smashed off.
With the demise of the main villains in the can, all that was left to do on this set was destroy it. The remaining Robomen were removed from the area and the big charges were set off which blasted out the control panel.
Prop 16 was smashed forwards through a wall
With the Earth’s magnetic powers being unleashed on the Daleks, silver props were sent out of control too. Whilst Cushing, Keir and Tovey were still on set, several stunts were completed.
When one Dalek was sent hurtling towards Susan in the corridor, AARUII 5 was used as it bore down on the camera, complete with visible scorch mark on the shoulder from an explosion at the very start of filming. But a swap was then made to AARUII 16 for the shot in which Susan was pulled out of the way. AARUII 16 was driven forwards into some light-weight FX panels, toppling over.
This shot was repeated without the human actors, whereby prop AARUII 4 was sent backwards through the false wall.
Dortmun’s Demise

In the first take, scorched prop 11 is on the left
Four Daleks were needed for one final destructive scene – the collapse of the pub on Dortmun. This was now able to be shot with the completion the bombed out ‘Watford Arms’ next to the remaining saucer landing site set.
The actor is exchanged for a dummy
With no props specifically built to be FX dummies, there was a fairly arbitrary selection used. Props AARUII 2, AARUII 4, AARUII 16, AARUII 11 were employed, at first seen emerging from buildings before moving into position for the FX shot.
In the second take prop 11 is on the right
After an explosive was detonated on the fender of AARUII 11, a larger blast brought the pub down on top of the props. Photos were taken on set which show this initial attempt but, like so many complex effects, unfortunately all did not go as planned and the shot had to be done again. The rubble had to be cleared and the Daleks removed so that the whole effect could be staged a second time.
When everything was put into position for another take, the Dalek props were in a different order and the wheelchair was positioned incorrectly. The debris was brought down once more, the shot was in the can.
Props 2 and 5 are seen time and again on the same corner of destroyed set
As production neared its conclusion, director Gordon Flemyng had an awareness that the the first half of the movie still lacked strong shots of the Daleks who were, after all, the real stars as far as children were concerned. Having achieved success creating a new phalanx shot, he decided to add further close-ups of Daleks which could also be edited in to increase the screen time of the aliens.
The three upper windows from the ‘Mary Bell’ shop were reused. Click for a larger view.
A small corner of a bombed-out street was created in studio to allow a series of shots to be captured which would be cut into the film to make it appear more dynamic. For this, the three windows in the set above the, now redundant, ‘Mary Bell’ shop were cut away and re-added to extra wall sections and repainted. AARUII 2 and AARUII 5 were employed for the multiple takes in the same place. AARUII 5‘s shoulders still carried a hint of the charring from the earliest battle scene but much had gone since it was filmed hurtling towards Susan in the corridor.
The two props were filmed repeatedly coming around a corner, each time with slightly different camera angles and lighting. It was also decided, for one shot, that these two Daleks would have explosive charges set around them which could create material that would enhance the lacklustre rebel battle.
Ultimately four different shots of AARUII 2 and AARUII 5 were used in the edit, as they repeatedly glide around the same destroyed wall. The first time they are seen in daylight, the second time it’s night, the third time there are explosions going off, and the fourth is dawn. This concluded the studio work.
Out of the Thames
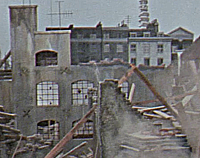
Destroyed warehouses at Battersea
The very last scene to be completed required a Dalek to emerge from the River Thames. With the presence of the invaders still somewhat sparse in the early scenes, director Gordon Flemyng was keen to address this on location. A recce was performed to seek a place in London that not only provided a suitable area of shoreline, but derelict buildings nearby which could represent a destroyed capital infested with Daleks.
The jetty at St. Mary’s Church, Battersea Church Road was determined to be an excellent place as it allowed access to the river as well as having warehouse buildings at hand. The structures were in a state of ruin and also fire-damaged, making them a perfect backdrop.
Prop 5 on location at Battersea
On 23rd March, four props were loaded onto a van and driven from Shepperton down to Battersea. AARUII 4 had just completed shots with Dortmun, AARUII 5 had just been used in the final filler shots and AARUII 9 and AARUII 10 had both been sidelined since the mine workings. Human stars Peter Cushing, Bernard Cribbins, plus two Robomen, joined them on the windswept banks of the Thames.
Rails for the Dalek to move one were set up at low tide. At high tide AARUII 4 was pulled out of the river to confront the lead actors, and this moment would become the first sight of a Dalek in the finished movie.

Prop 4 emerging from the Thames
At the nearby derelict docks warehouses, two men heaved the casing of AARUII 5 up a fire escape and positioned it in a doorway in the distance. AARUII 9, which had served throughout the film was positioned in the foreground with AARUII 10, still bearing its curious lampshade attachment.
It was fitting that the last moments filmed were the only ones actually shot in the city that was to form the setting for the first half of the film.
Soviet delegates meet Daleks. Click for a larger view.
These iconic moments concluded what had been a very troubled shoot.
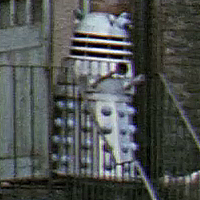
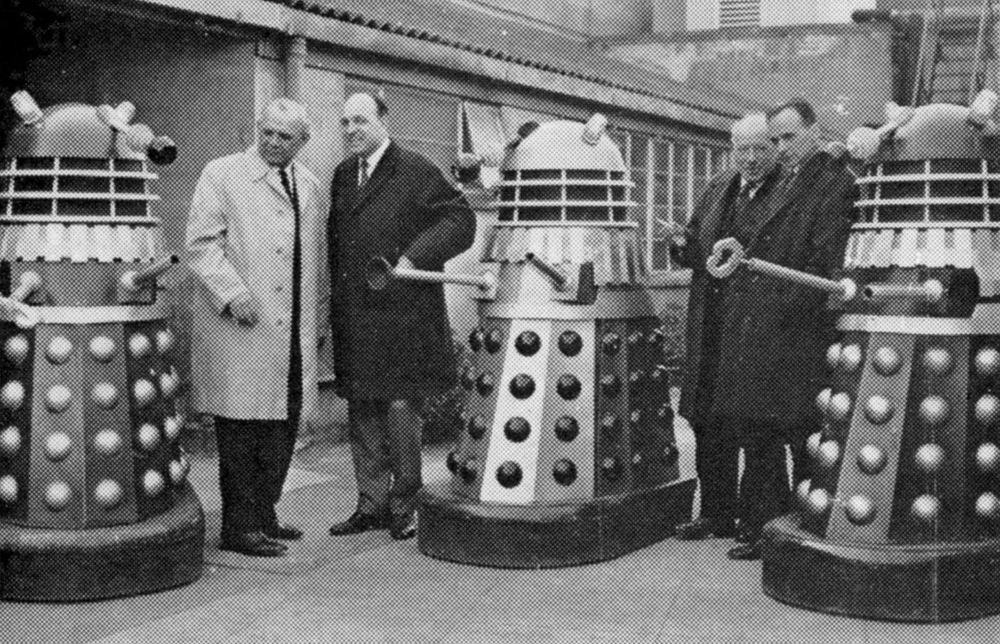
Back at Shepperton, delegates from the Soviet Culture mission were visiting the studio. The trip was organised to forge closer relations between the two countries film industries. The guided tour, on 25th March, included meeting Daleks AARUII 9, AARUII 19 and AARUII 1. All had been touched up and the latter had had repairs after its fall down the bomb shaft. Much amusement was derived from trying to explain what the Daleks were via an interpreter, according to tour guide ‘Andy’ Worker!
A Rush of Publicity
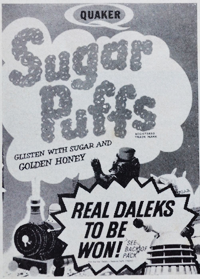
Sugar Puffs invested in the film
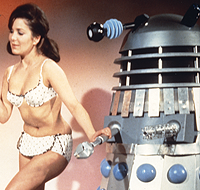
After filming was completed, an extensive round of promotional work was planned. Quaker had provided extra funding for the film in return for some unsubtle ‘Sugar Puffs’ product-placement and, as a further tie-in, a competition was run in which people could win real Dalek props via Sugar Puffs packs.
Three and a half million of the promotional packs were sent to shops for the launch of the film on 5th August, with the accompanying competition closing in February 1967. TV Century 21 magazine also carried the competition in full page ‘adverts’. Entrants had to rank a series of options in the order they felt was the best way to fight a Dalek along with the obligatory “complete this sentence” tie breaker which asked how Sugar Puffs could help in the fight!
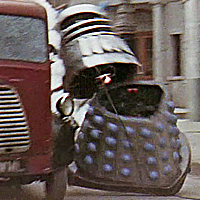
The extra cash made available by the deal allowed for a large scale promotional campaign to be carried out country wide, just as it had for the first film a year earlier. In addition to large cardboard Daleks being made available to shops and cinemas, the screen used Daleks were pressed into service again. They were mounted on the rear of trucks and ‘street stunted’ in the London, Birmingham, Liverpool and Manchester areas, visiting cinemas and supermarkets. Dalek movie collector, Mick Hall, recalls seeing one such truck in Luton. Trade magazines reported that an extra “24 life sized models” would also be used in the promotional tour.1
Despite the increased production values and large scale promotion, the second Dalek film performed relatively poorly when it was released no plans for a third film were put in place.
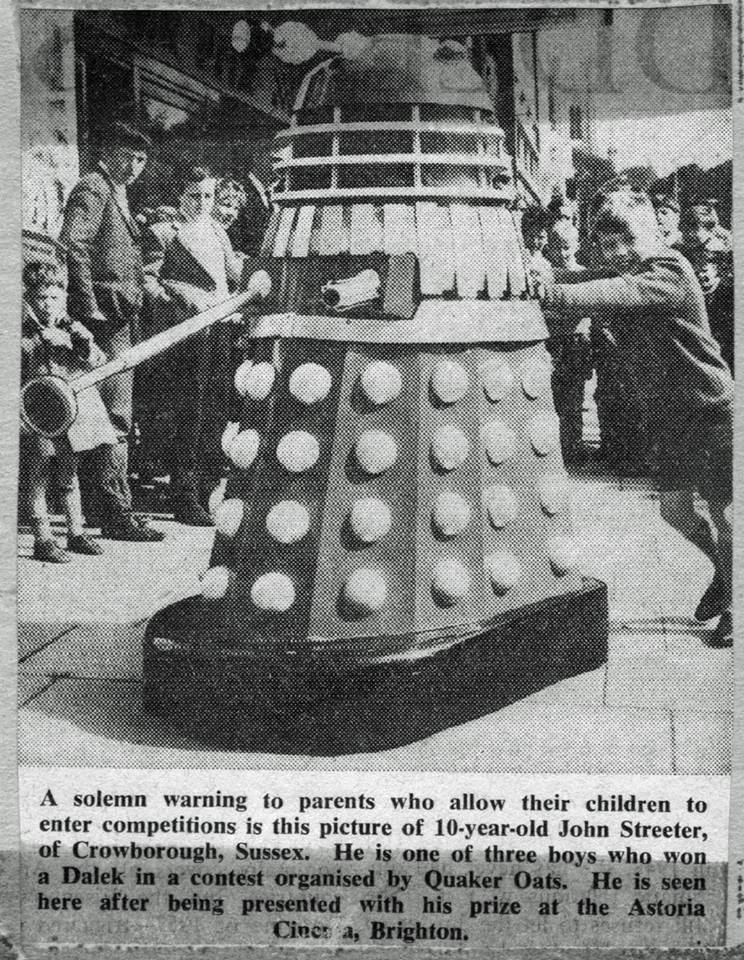
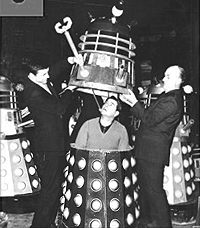
John Streeter receives his Dalek in Brighton. Image – With thanks to Richard Hollis. Click for a larger view.
There were mixed fates for the Dalek props after the promotional period was over. When the Sugar Puffs competition closed in February 1967, three props had been given away, two of which were a mix of AARUII 2 and AARUII 5 and the other being AARUII 7. The lucky recipient of AARUII 7 was 10 year old John Streeter from Crowborough. He was presented his prize at the Astoria Cinema in Brighton.
The five Daleks hired from the Curse of the Daleks were returned to John Gale who had planned to take the production on tour although, due to the conversions, the props he received back were rather different. An advert appeared in trade magazine, The Stage, on 13th October 1966 reporting the whole production, including the Dalek props, was up for sale.
Shortly after, four of the movie Daleks appeared in the hands of their creator, Terry Nation, including the gold AARUII 19 which had been given a new, red and black paint scheme. The other three props were AARUII 11, AARUII 9 and, surprisingly, much of AARUII 14-12 which hadn’t sustained too much damage when smashed by the van. The shoulders were still in acceptable enough condition to pair up with a good skirt. All four of the skirts exhibited the hole that the Curse props had in the rear of their skirts and therefore suggests that Nation purchased four of the Daleks when they became available.
A complete explanation and analysis of these Daleks and what happens to them can be found on the Nation’s Daleks Page.
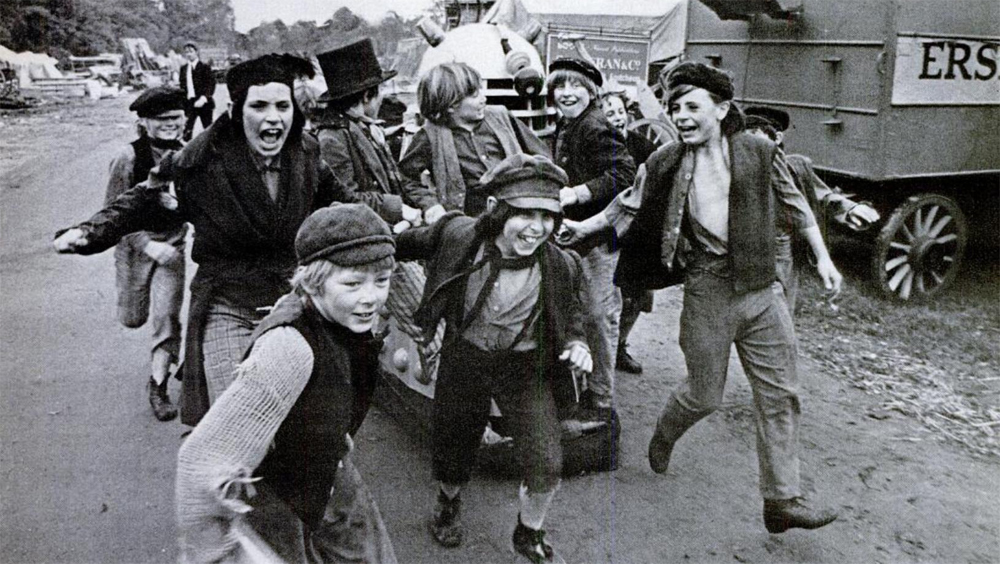
The cast of Oliver! play with a Dalek on the Shepperton backlot. Click for a larger view.
The remaining props were left to sit on the backlot of Shepperton for months to come where they were subject to all weathers and the heavy hands of actors, crew and visitors alike. In an interview, Ron Moody recalled that during filming the filming of Oliver! in 1967, “we kept passing these battered, plywood Daleks. They were all falling apart in the rain and the weather. Rather a sad sight in a way.”2
Despite the public becoming increasingly tired of the metal monsters, they were deemed a valuable hook to soften the planned transition between William Hartnell and Patrick Troughton on the television series. And so, despite 1966 being a year that saw the conclusion of the longest Dalek story ever, a stage play, and a new film, the Daleks would return to the small screen yet again before the year was out.
Below is a full breakdown of every prop used in the movie with some notes on identifying them: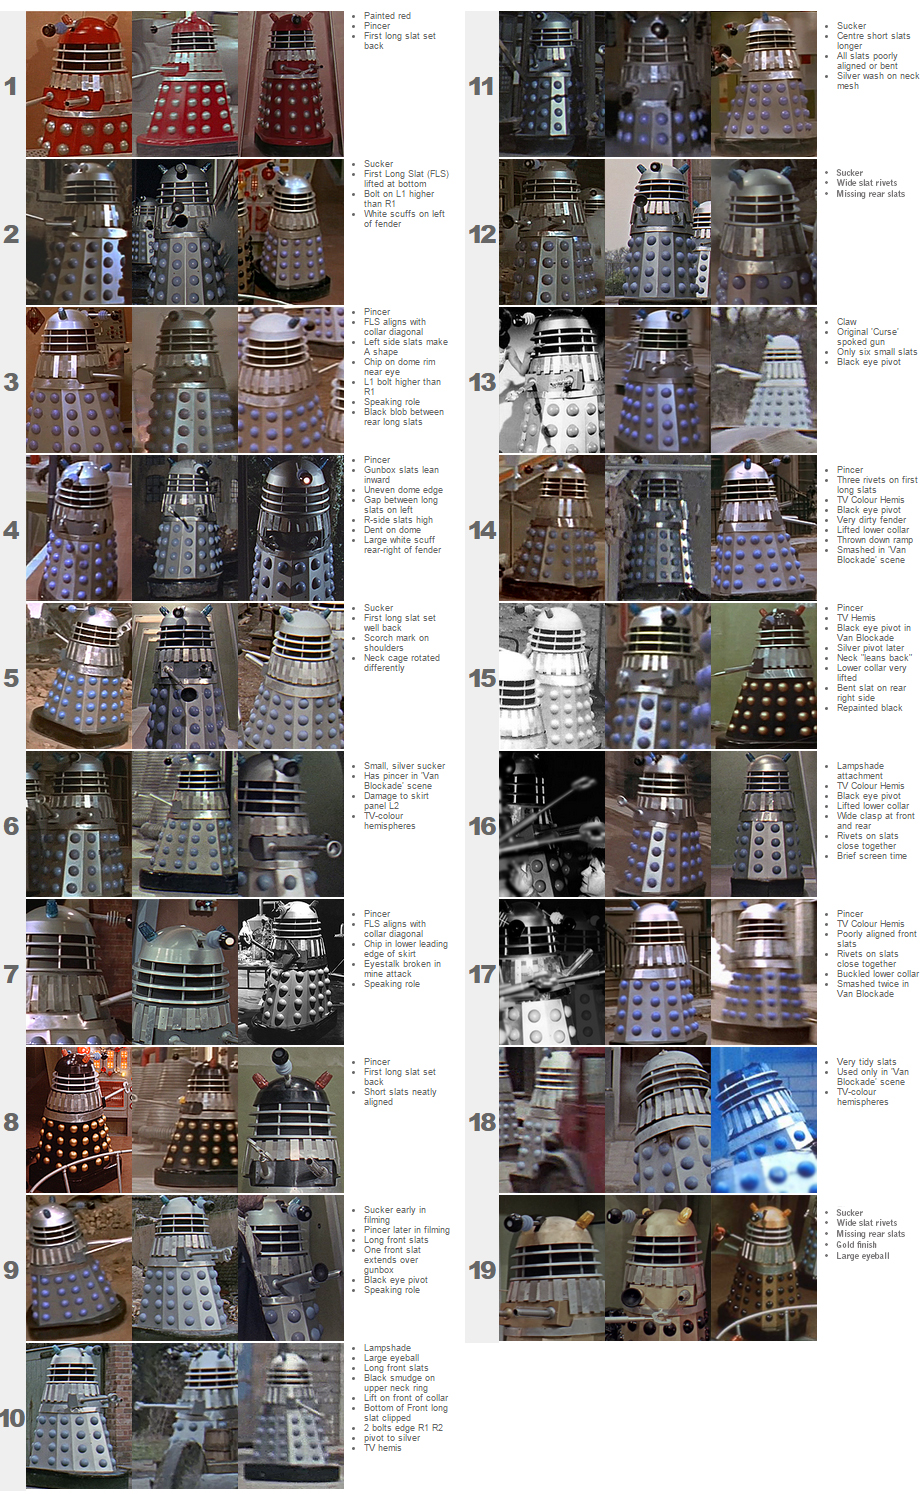
Next Page: The Power of The Daleks
-
Despite the trade magazine claims that 24 extra Daleks were made for the tour, there is in fact currently very little evidence this occurred. There are no known photographs of non-screen used Daleks being used on the tour for example. Its possible that it was planned to make them but initial reaction to the film meant the idea was dropped. Thank you to Mick Hall for details of the tour.
-
Thank you to Richard Bignell for the quote from Ron Moody taken from his interview with him.